Jubilee Laser
[diy science laser jubilee Jubilee is an open-source & extensible multi-tool motion platform which can be used for laboratory automation. Let’s make a laser tool…
Science backstory
We’ve been having fun with a little Wainlux K10 5W diode laser ($150/alibaba) to make laser-cut paper microfluidics. To continue the fun, we want to build a frugal self-driving lab device to optimize parameters, etc.
Background info
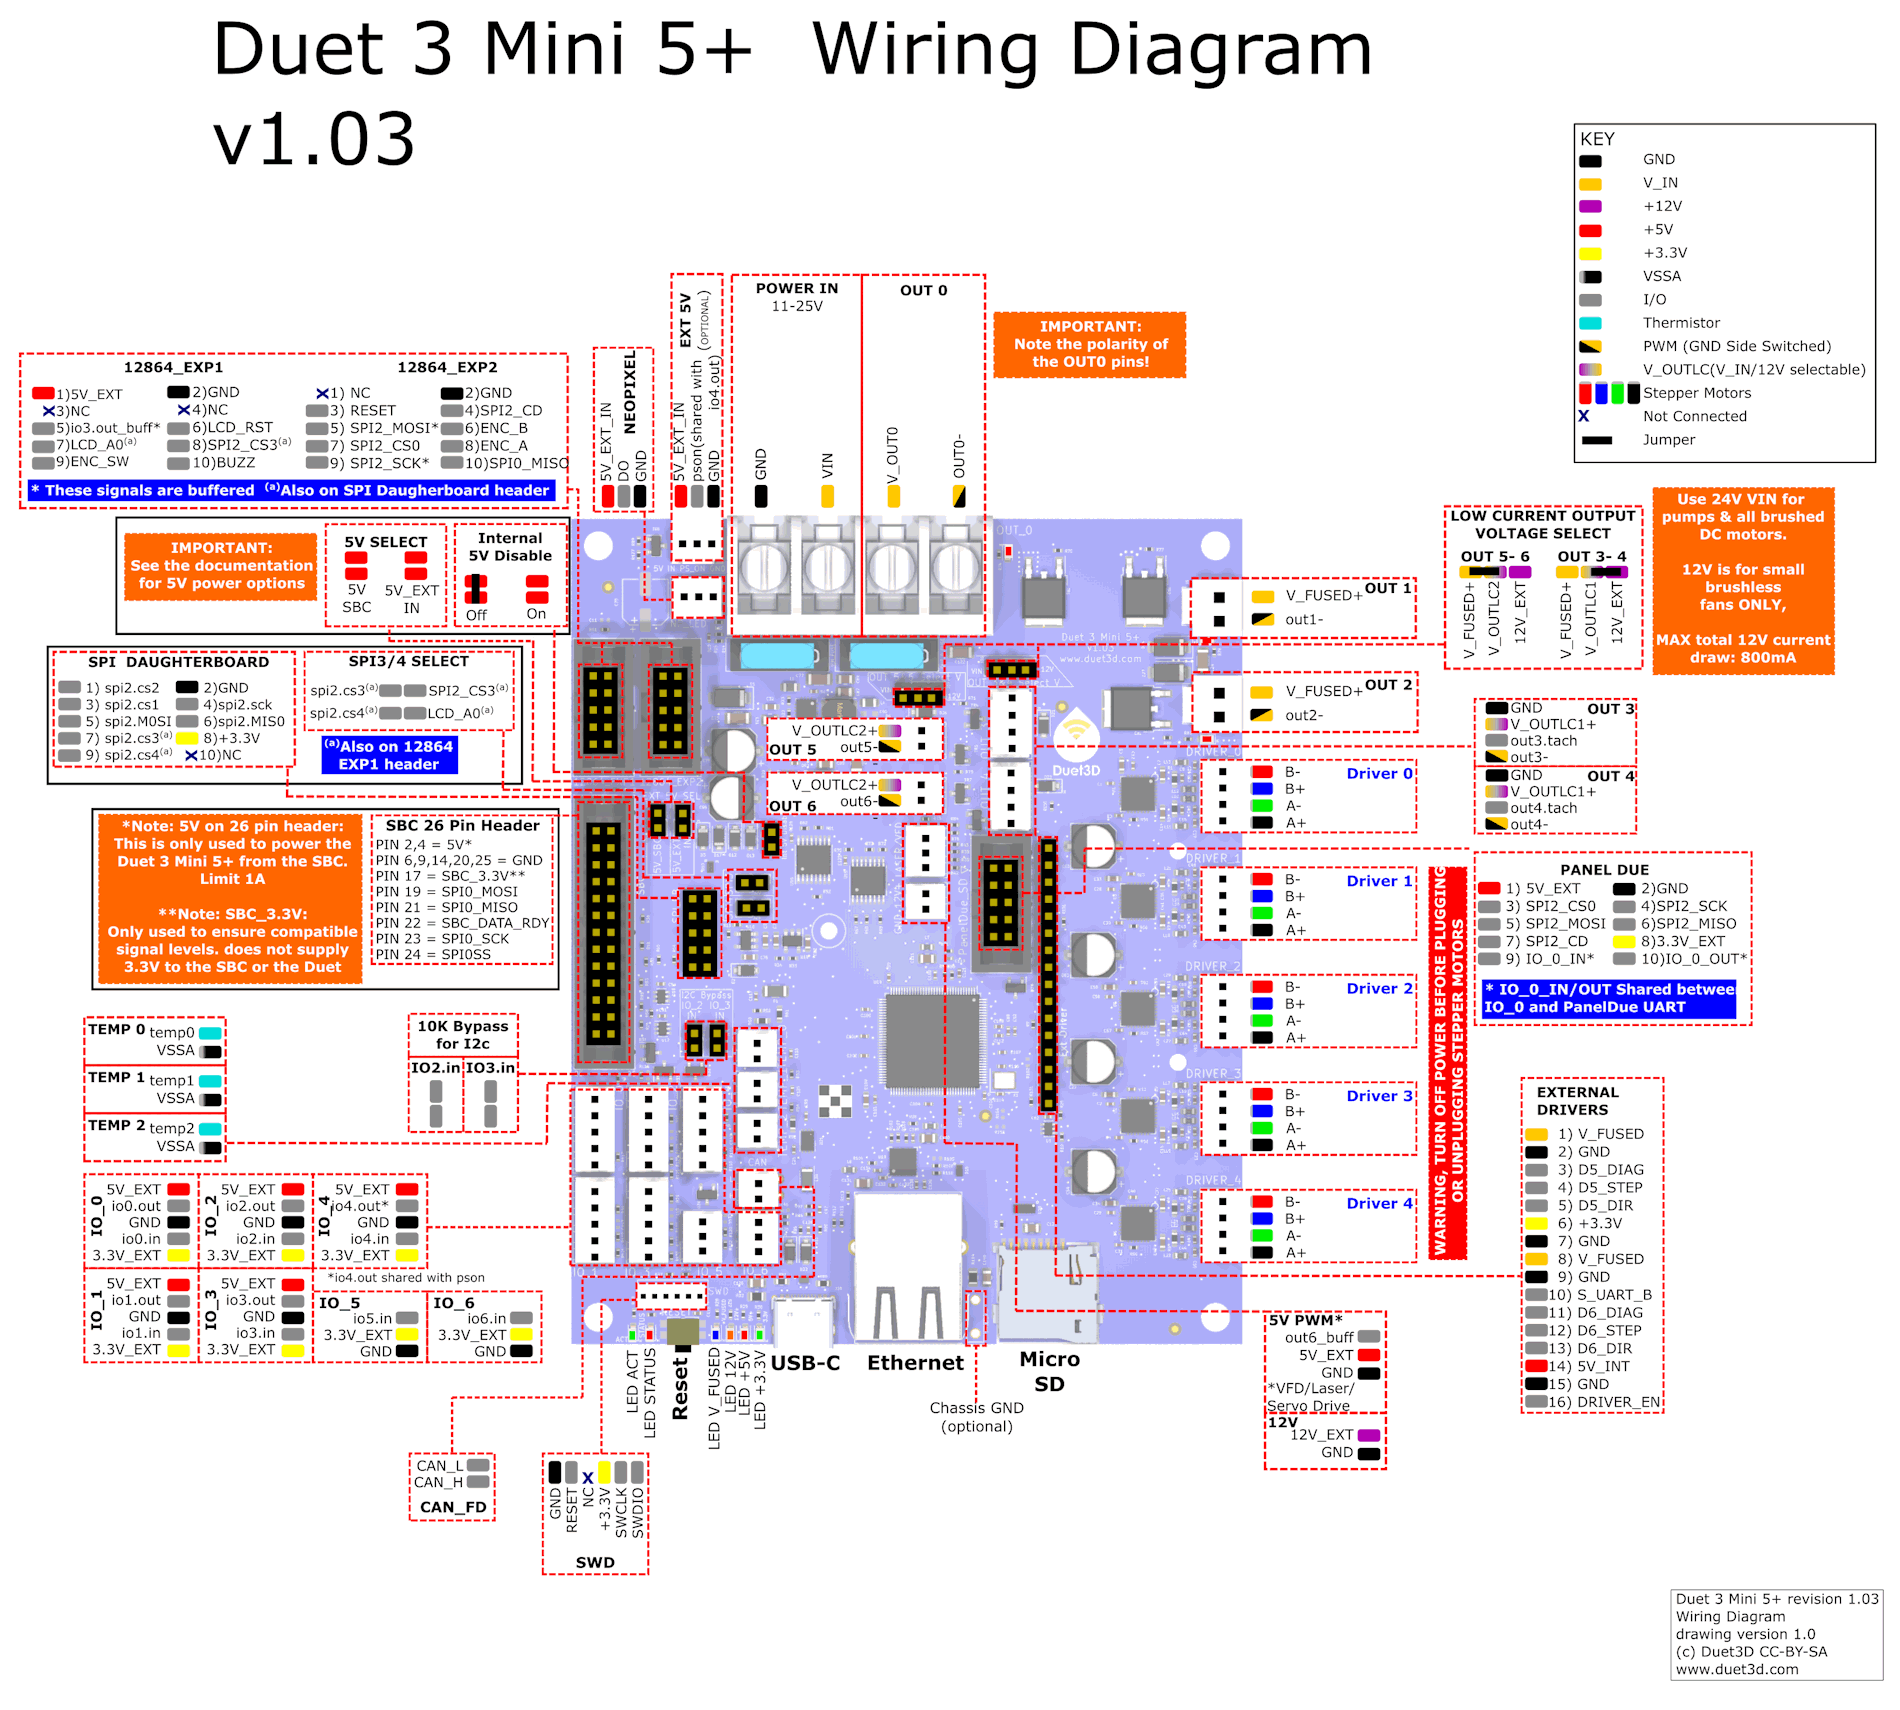
Jubilee uses Duet 3 Mini 5+ which natively support laser engraver/cutter control — assumes a standard 12V laser with 5V active-high PWM signal — so there shouldn’t be any electrical fiddling needed to make this work, just mount it.
First Step: 5 mW 650 nm laser pointer
Objective: Demonstrate that you can successfully operate a laser tool on the Jubilee platform, using a low power Class II laser (glorified laser pointer)
Supplies:
- 5 mW 650 nm TTL laser diode ($19/adafruit) – this is switched in the same way that bigger lasers are.
- JST XH 2.5 - 3 pin socket ($1/adafruit) — these are the standard connectors used on TTL lasers
- JST XH2.54-3Pin cable ($7/amazon) — 80 cm tends to be a common length, but maybe go longer instead? 150cm?
- Build an adapter from Molex KK254 (on the Duet) to JST-XH2.54
Laser Hello-World with the Duet Mini 5+
The Duet Mini 5+ has a 3-pin Molex KK254 connector on IO6 which provides 5V power, ground, and a 5V PWM signal. Wiring diagram.. This is convenient for testing with a low power TLL-controlled laser pointer.
To enable the laser, add the following to your config.g file:
; Duet 3 Mini 5+
M452 C"out6"    ; Enable Laser mode, on out6, with default max intensity being 255, and default PWM frequency
Send a G-command with S options to set laser power (from 0 to 255)—the example below is the lowest power.
G1 S1 ; S parameter sets power, use the lowest for this test
Note: The laser is only on while the motion is taking place, so you need to be making a move to see it (e.g., G1 X100 S1). You can just do a slow move (change the velocity parameter) so that it stay s on for a while.
Physical structure
Design Jubilee tool to hold it in place. Good practice in designing tools…good cad practice for students.
Here is my design — there is an additional space to put in a heatset insert and use a set screw in the axis to lock the diode in place. Works just fine; no supports needed, just print in PLA lying on its back and the diode holder will be self-supporting. I used a vitamin kit from Luke’s Lab for the various screws, Delrin lock plate, etc.
Safety-third!
Everyone gets two changes at laser eye safety. Don’t look into the laser with your remaining eye.
But seriously, folks. It is worth learning about laser safety. This is a nice intro video; I especially liked the chart of recommended OD by wavelength
-
Get some laser safety glasses
-
Build an enclosure. You can buy rated acrylic sheets (laser cut them with a CO2 laser) to construct side panels
Next Step: 5W 450nm diode laser
update: 09/2025 currently on pause because of concerns about safety.
Objective: After establishing that you can do this safely, go for MORE POWER! Class 4 laser
- LaserTree 5W 450nm laser module ($85/amazon) seems to fit the bill: standard 12V power, 5V PWM control.
- JST XH2.54-3Pin cable ($7/amazon) — if you don’t have one already from the last experiment.
- Be sure to get some laser safety glasses
Build:
- Make an adapter from two inputs: One from the 12V supply and Ground pin; the other from the 5V PWM output that we used above.
Physical Structure
TODO: Design Jubilee tool for 5W laser module
Test
TODO: Test
Other things
- Acmer 10W diode + 2W IR laser module $659 (but unclear how you interface the mode change)